7 Ways to Access Google Meet
How to Transfer Your Jamboard Files to Miro: A Simple Guide
When Google Jamboard was discontinued, many users wondered how to preserve their collaborative workspaces. If you’re in that boat, don’t worry—your brainstorming sessions, creative ideas, and team projects don’t have to end there. Miro, a powerful visual collaboration platform, makes it easy to import Jamboard files and ensures you can continue your work without interruption.
In this step-by-step tutorial by Cloudfresh, we’ll walk you through two easy methods to transfer your Jamboard files to Miro, guaranteeing a smooth transition for your team’s productivity and collaborative workflows. Let’s get started!
Method 1: Import Directly Through Miro
1. Access Your Miro Dashboard
- Go to the Miro dashboard.
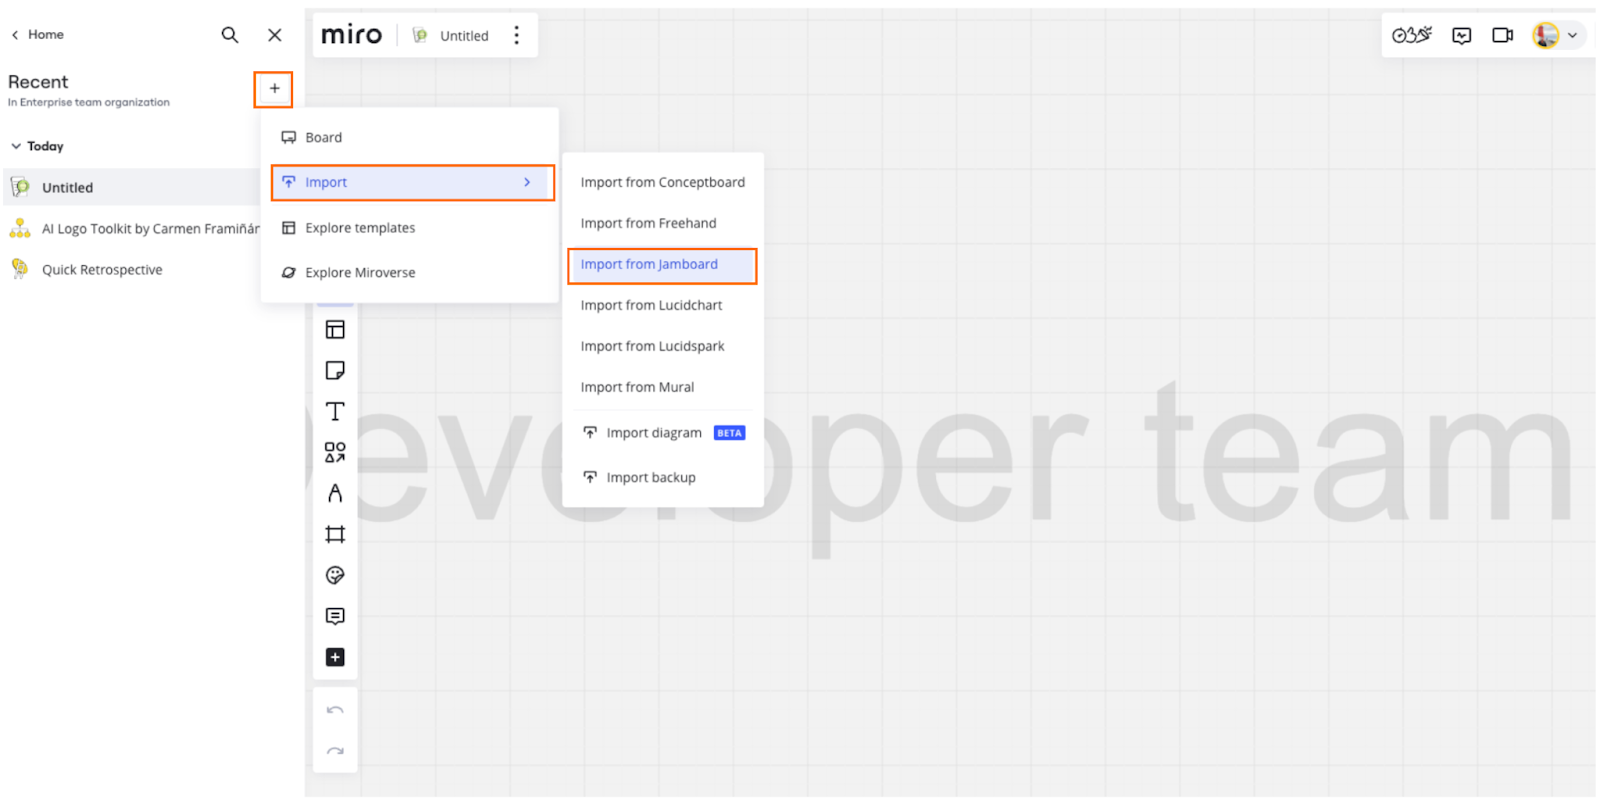
- Click “+”, select Import, and choose Import from Jamboard.
2. Start the Import
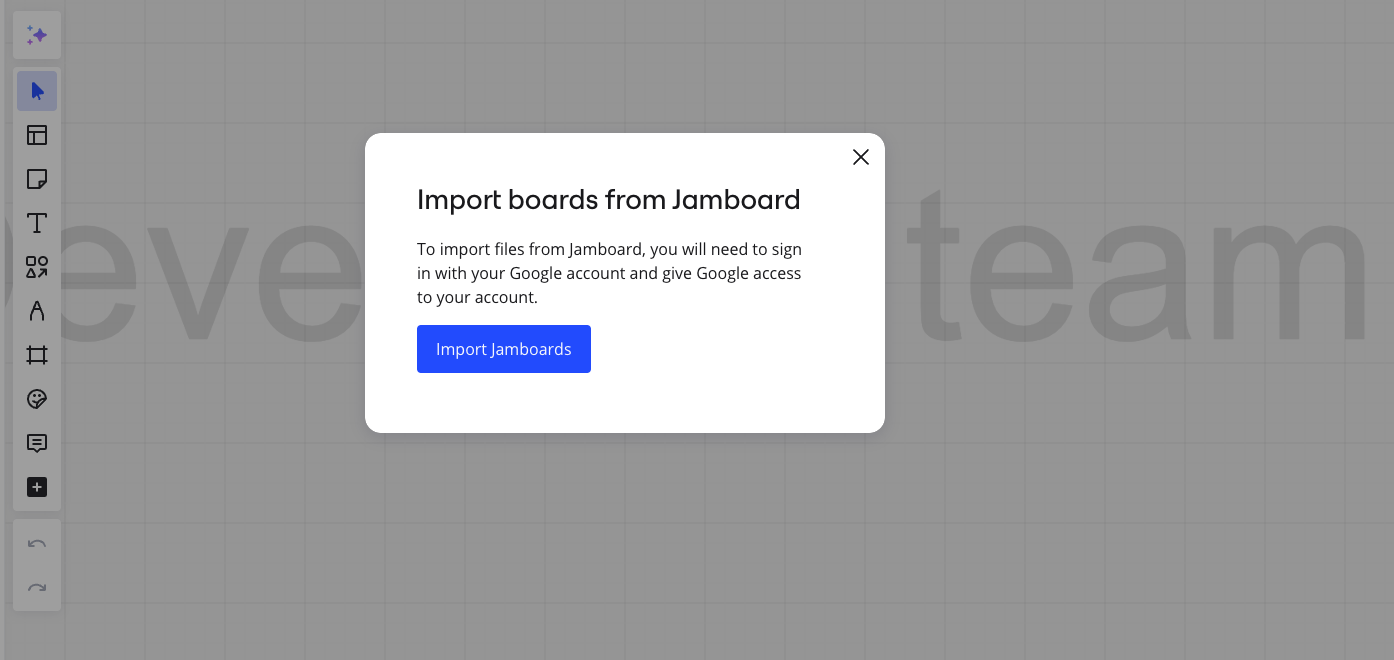
- Click Import Jamboards to begin.
3. Select Your Google Account
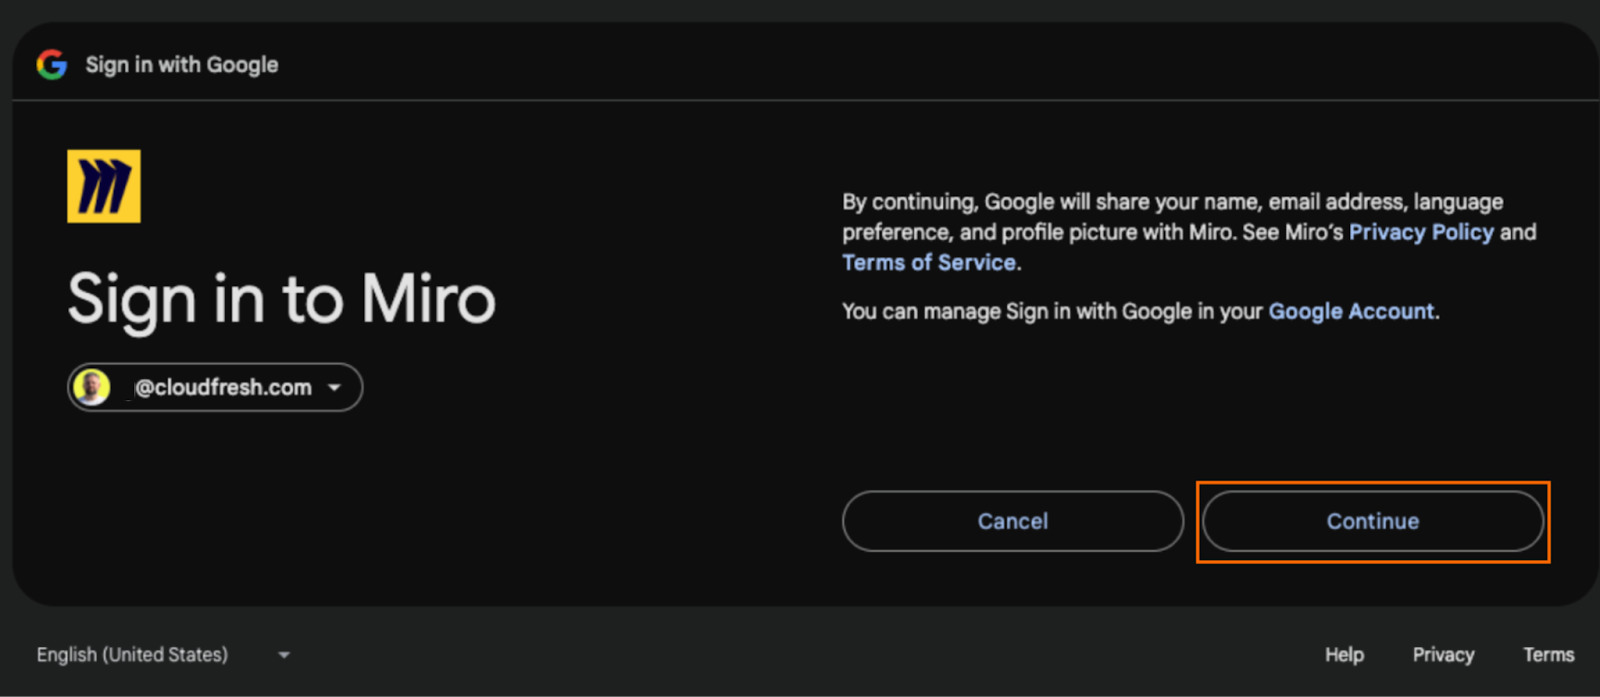
- Choose the Google Account where your Jamboard files are stored.

- Click Continue and, if necessary, review the Privacy and Terms beforehand.
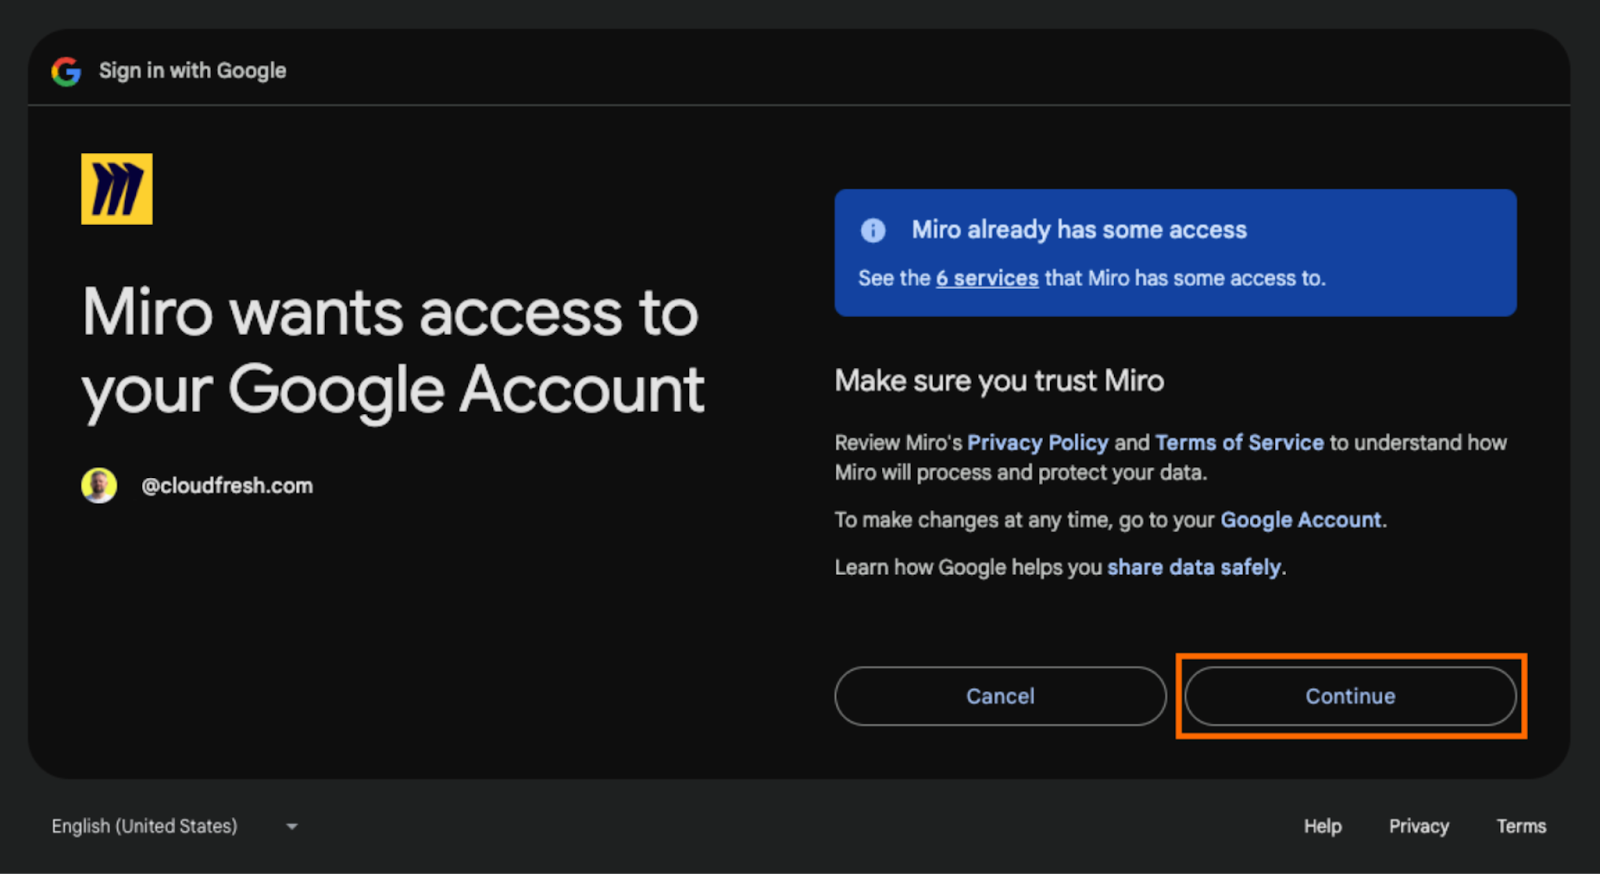
Review Privacy & Security – Cloudfresh
- If your Google Account is already linked to Miro, simply click Continue again, or take a moment to review the Privacy and Terms first.
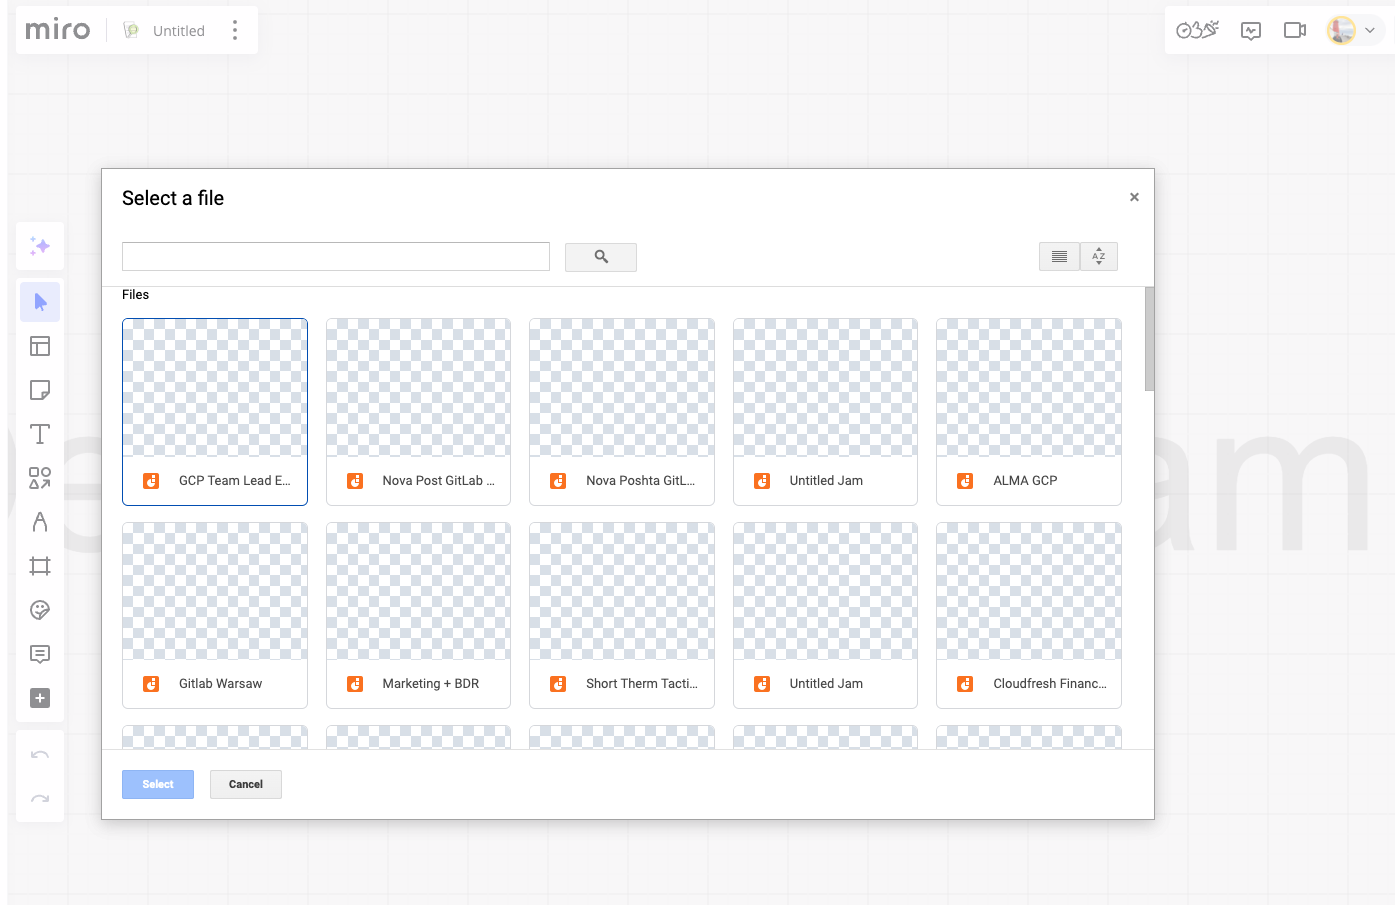
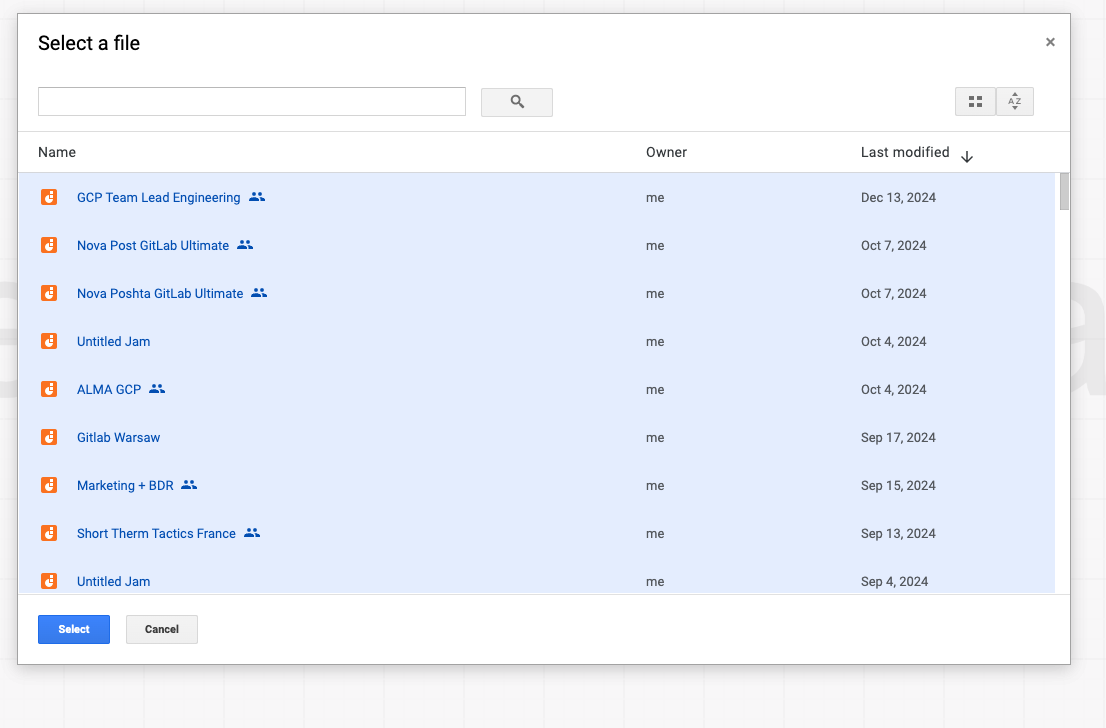
4. Choose Your Jamboards
- Select one or multiple Jamboards (up to 10 at a time).
- Click Select to confirm your choices.
5. Monitor the Import
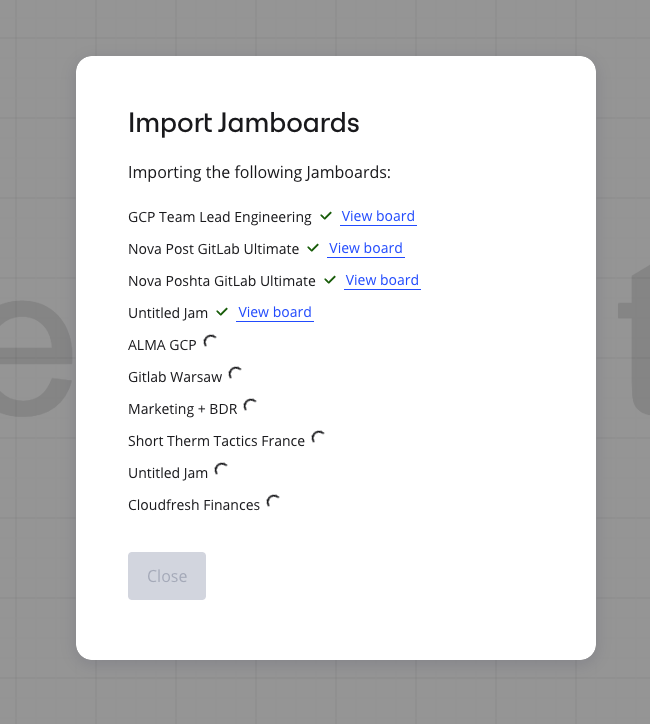
- The system will display the progress of your import.
- Once completed, your Jamboards will appear in your Miro dashboard.
6. Organize Your Boards
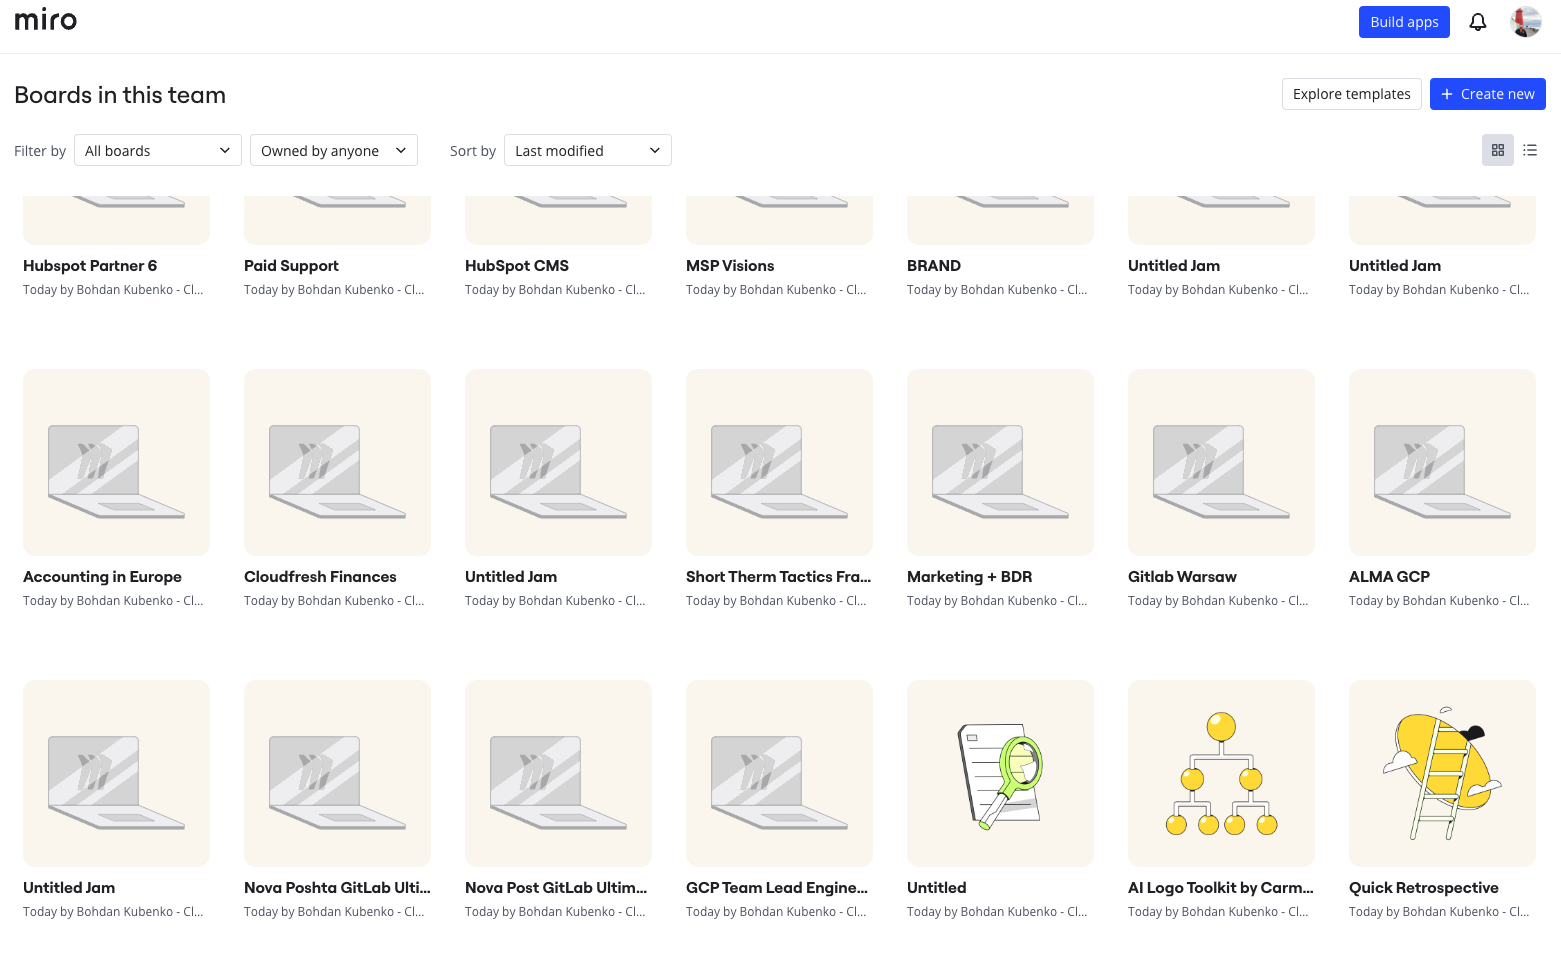
- Arrange your imported boards in your Miro workspace, ready for further collaboration and brainstorming.
- Repeat the process if you need to import more than 10 files.
If you need to import additional Jamboards, simply repeat step 6.
This concludes Method 1.
Method 2: Import Jamboard Files as PDFs
1. Export Your Jamboard as a PDF
- Open your Jamboard at Jamboard
- Click the menu (three dots in the upper-right corner) and select Download as PDF.
- Save the file to your computer.

2. Log in to Miro:
- Go to miro.com and log in to your Miro account.
- Create a new board by selecting Create New, then click Import, and choose Import from Mural.
- If prompted to verify your Google Account access, refer to the steps outlined in Method 1, Step 3 earlier in this guide.
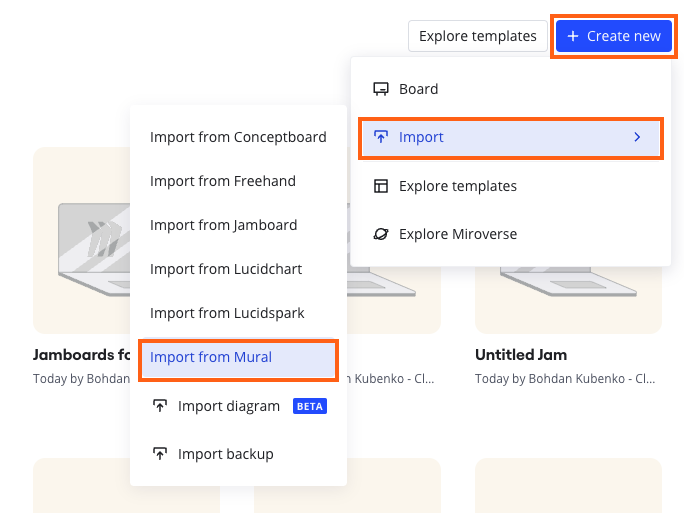
3. Import the PDF
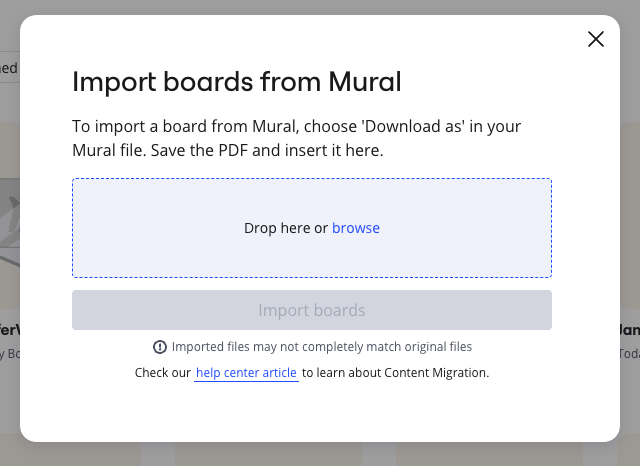
- Drag and drop the PDF into your Miro board window, or click Browse to select the file.
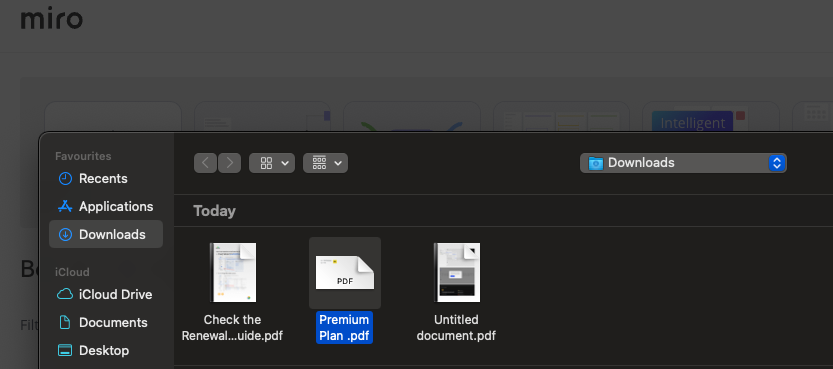
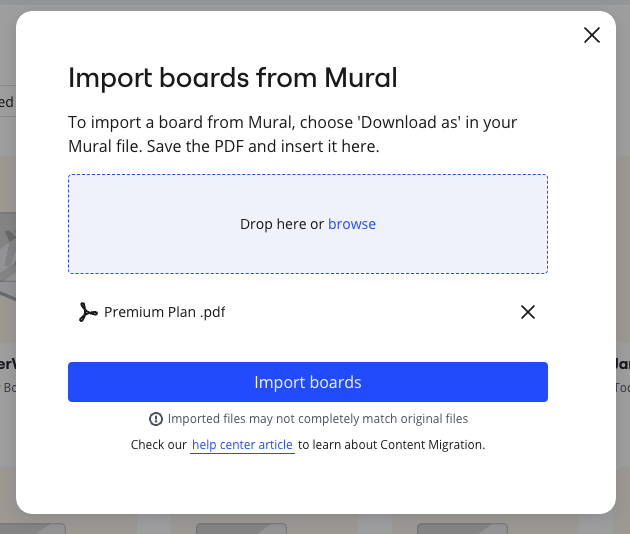
- Click Import boards and wait for the upload to complete.
- A notification will appear confirming the successful migration of Jamboard files to your Miro board.
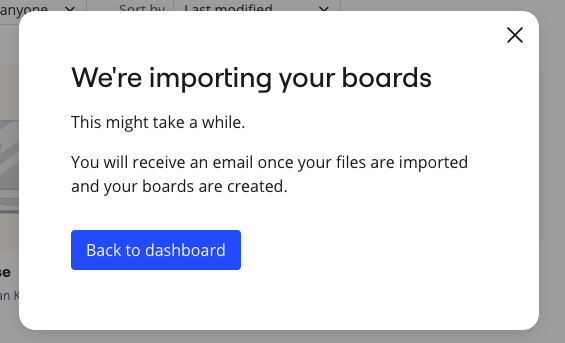
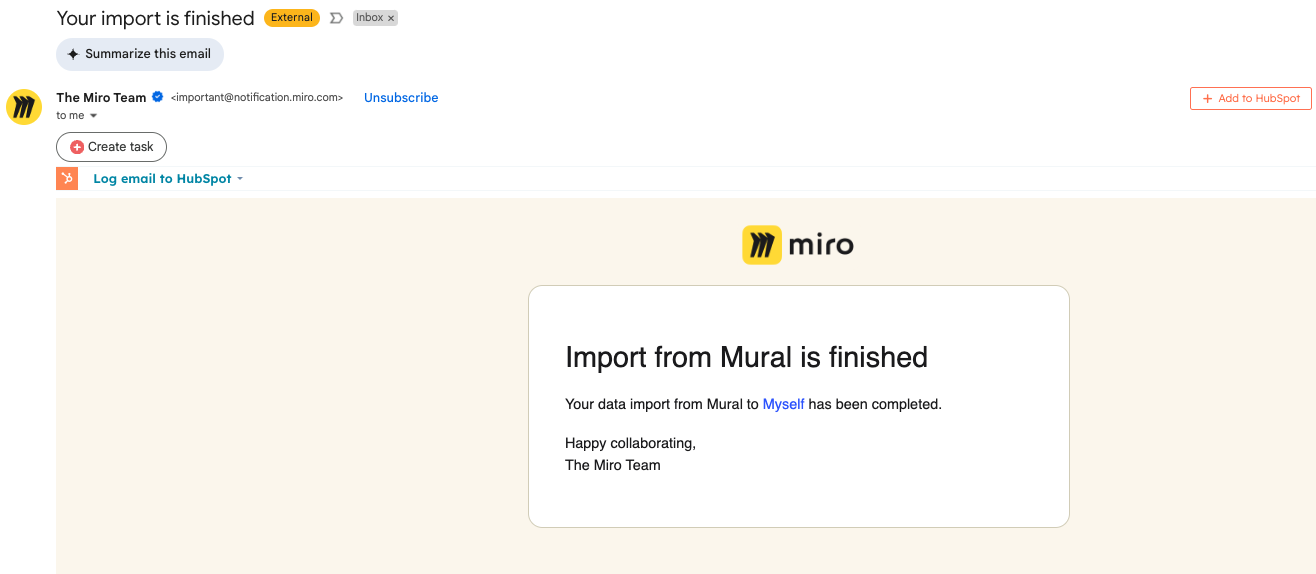
- You will soon receive an email confirming the completion of the import.
4. Place and Adjust the Imported File
- Miro will convert the PDF into an image and place it on your board.
- You can resize, move, or rotate the imported content as needed.

Additional Features for Enhanced Collaboration
Once your files are imported, you can make the most of Miro’s advanced collaboration tools:
- Add sticky notes, shapes, and text to further enhance your boards.
- Use Miro’s extensive template library to structure your ideas more effectively.
- Invite your team members to collaborate in real-time directly on the board.
Important Note: Imported Jamboards will appear as static images, and some interactive elements from Jamboard may not carry over. However, Miro’s tools allow you to build upon your previous work and explore new possibilities for collaborative brainstorming and team productivity.
We hope this guide makes your transition from Jamboard to Miro smooth and hassle-free. If you have any questions or need assistance, our Cloudfresh support team is here to help—just send us a message at [email protected] or by filling out the form below.
Your next big idea deserves the right space—begin with Miro today!


