


Unlocking Gmail’s Potential: A Step-by-Step Guide
Google Workspace 09.08.2021 
Automation with AppSheet Automation
Since AppSheet has become available to all users, we are responsible for telling you how to automate the bot properly and how you can use it.
The AppSheet framework is great for automating emails, chatting or any other occasion that requires automated email submission. At the same time, you do not even need to write one line of code – everything is simple to understand and automatically configurable.
In order to create automatization, you need a ready-made application. Below, we will provide an example of setting up a bot for onboarding new employees. There are three simple steps to set up your system:
- Create a bot;
- Customize events and process;
- Start testing the bot.
You can also see how to set up your bot in this video here. Let’s look at the instructions.
Create a bot
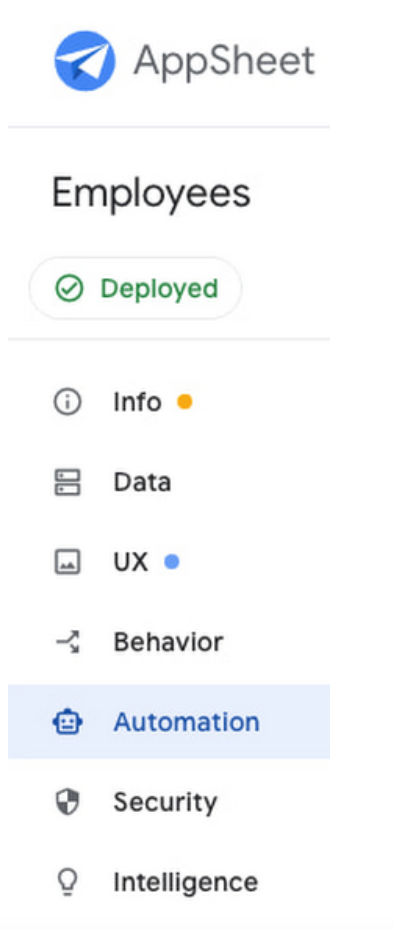
- Click “Authorize” in the AppSheet user interface, then go to the “Bots” tab and click “+ New Bot”.
- Enter “employee send email” in the bot name line;
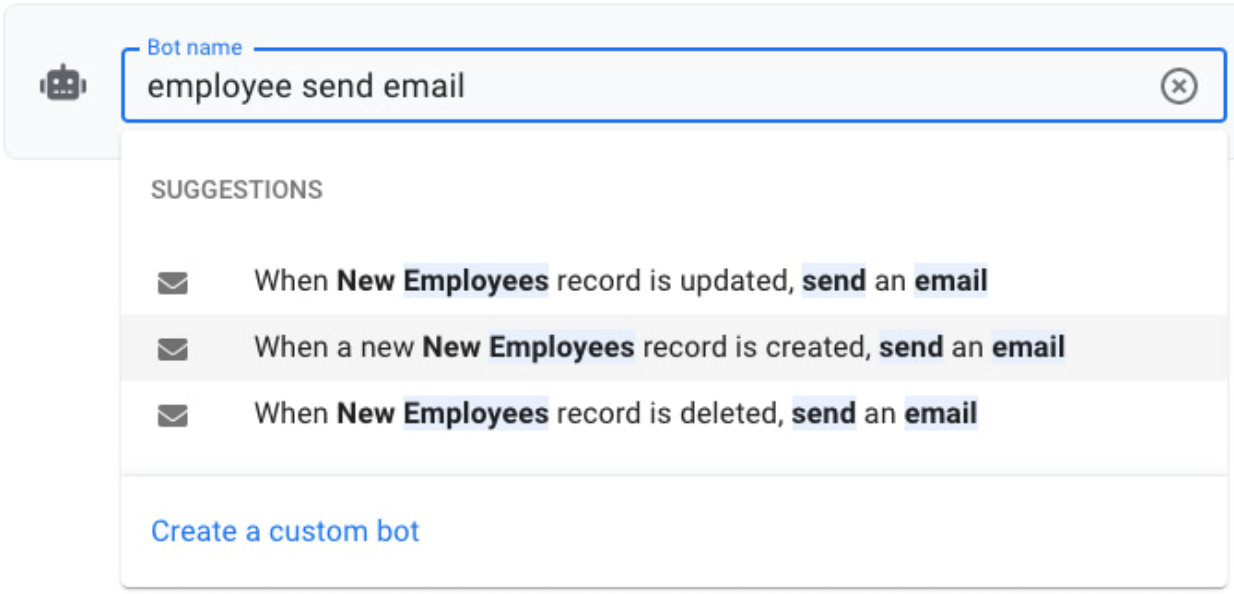
- From the offered options choose the second one, “When a new Employee’s record is created, send an email”, or click “Create a custom bot” if you do not see the system’s suggestions.
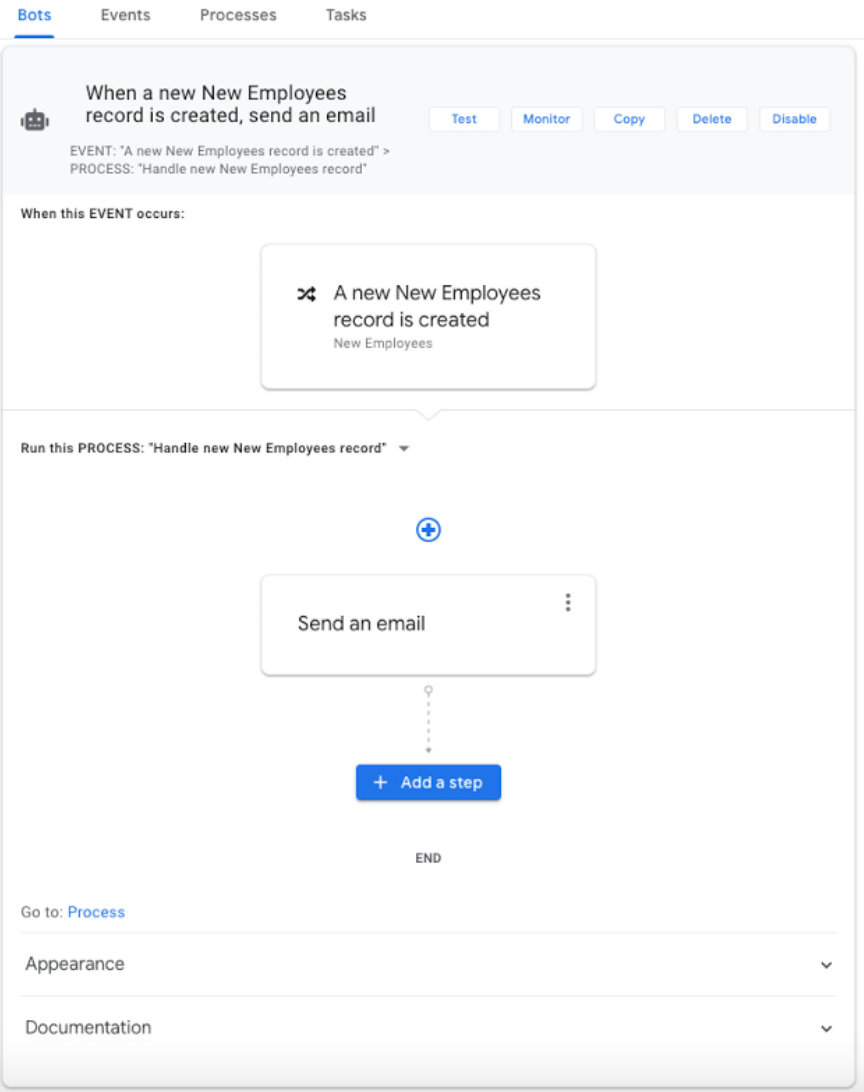
Congratulations! You have created a bot, now let’s configure it to work correctly.
Setup Process
Each bot has two ordinary settings – a process (to perform sequential tasks) and an event (when something happens).
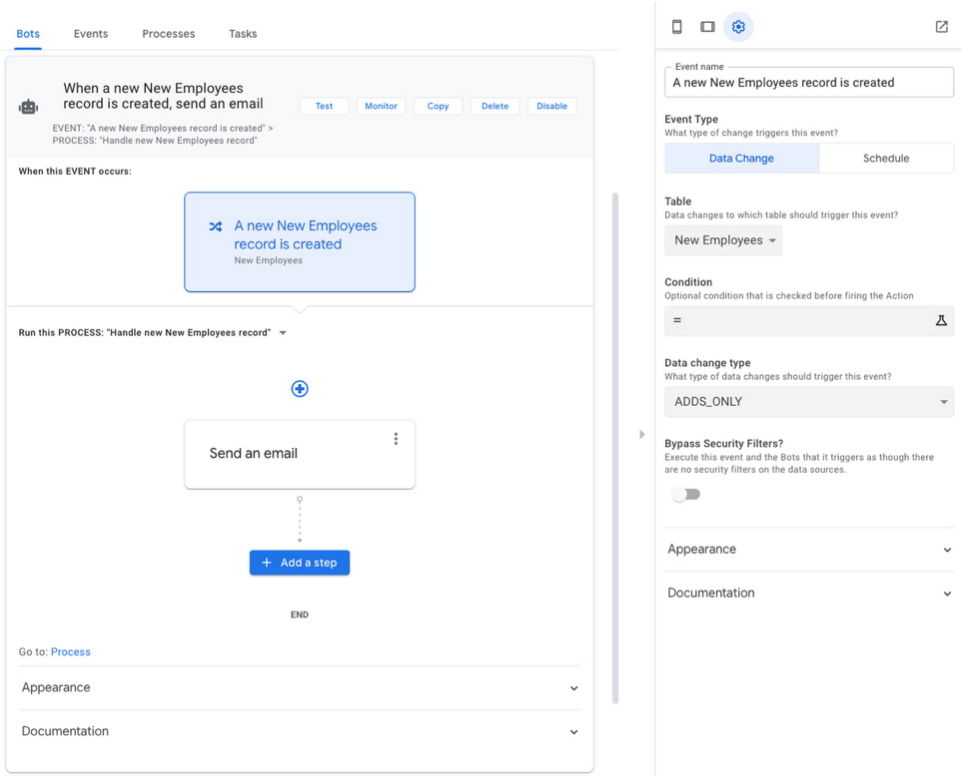
For event setting:
- Click on an event to display its description in the settings panel;
- If everything is okay, then you can proceed to the next step of creating the event.
For process setting:
- Click the “Send Email” button;
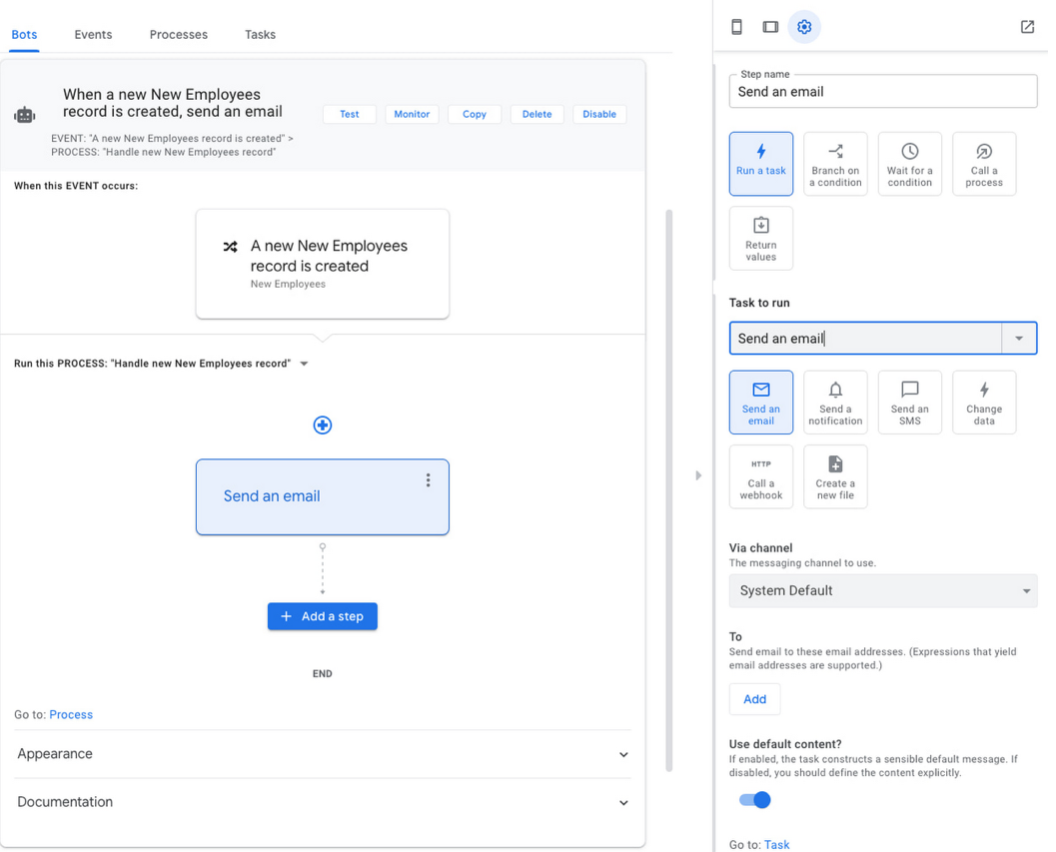
- Then click on “Go to: Task” at the bottom of the settings panel;
- You can use any tools on the platform, including templates, to customize your email.
After completing all the above steps, your task should look like this:
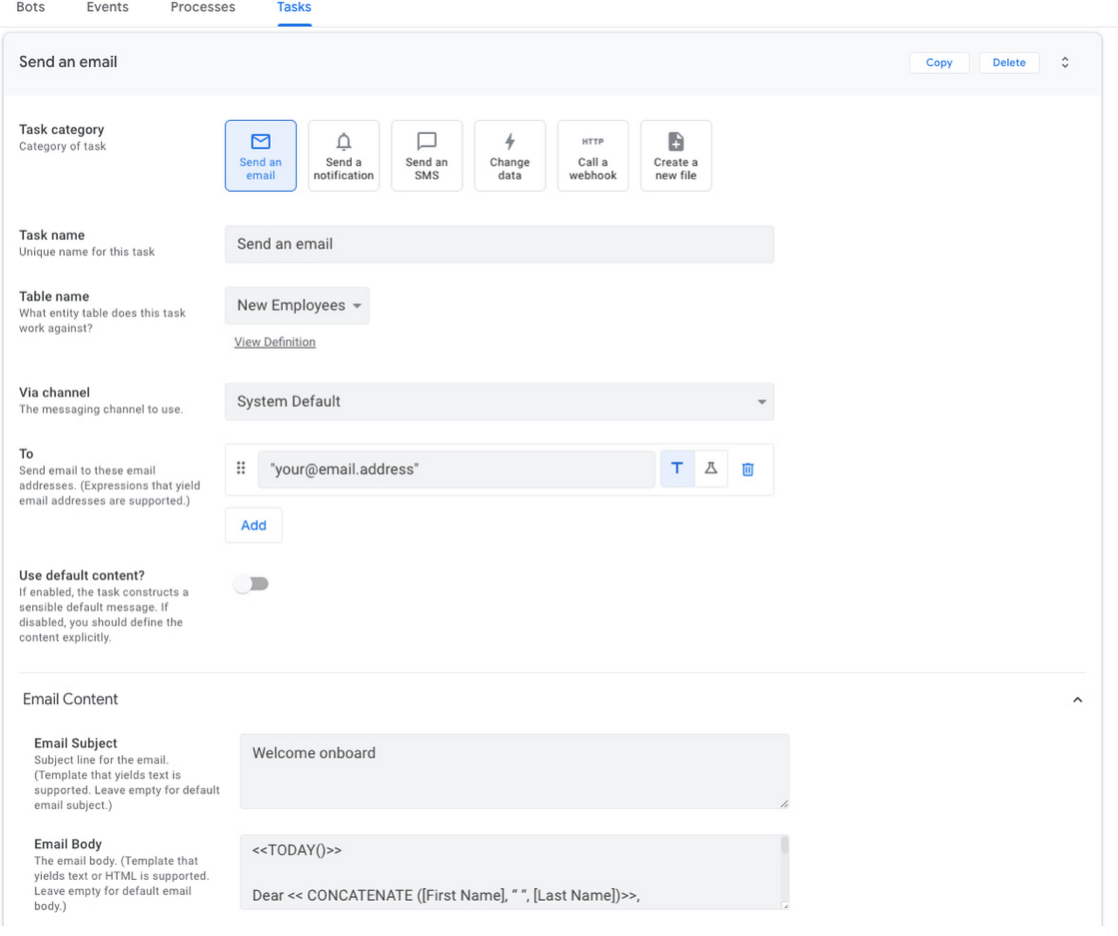
- Now you have to save all the settings by clicking “Save”;
- The final step is to deploy your application. Click on the blue “Not deployed” icon in the upper left corner of the screen and follow the instructions. Ultimately, your application should have a green “Deployed” icon.
Test your bot
After you’ve created and configured your bot, it’s time to start testing it.
- Click on the mobile device icon in the upper left corner of the right panel to see the “New Employees” feature;
- Then click on the big blue Plus icon and create a new employee. Do not forget to use your email address and then click the “Save” icon;
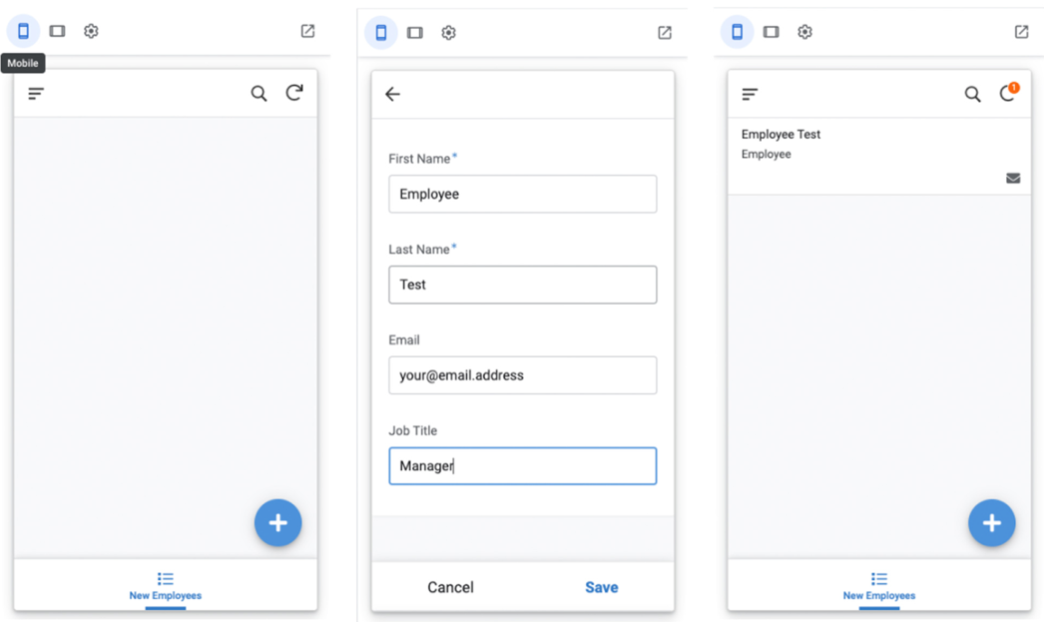
Immediately after completing the previous steps, you should receive an email confirming your registration.
Now your bot is ready to use, and you don’t even have to write any special code. Thanks to AppSheet, you can easily create bots by filling your emails with the content you need. If you have any questions when using AppSheet, you can safely contact Cloudfresh, and we will help you with any problems.
The Cloudfresh team is a unique center of expertise for Google Cloud, Zendesk, and Asana. For these products, we can provide you with the following services:
- Customization;
- Development;
- Integration;
- Training;
- License;
- Support.
Our specialists will help you optimize your IT infrastructure, develop integrations for better system interoperability and help create completely new structures and processes for your teams, while our support center will provide you with the best customer experience!

Get in touch with Сloudfresh