


Google Workspace Debuts AI: Top 6 Use Cases for Gemini in 2024
- Why Merge Google Workspace Accounts?
- How to Merge Two Google Workspace Accounts

- About Us
Google Workspace 04.02.2025 

How to Merge Google Workspace Accounts
- Why Merge Google Workspace Accounts?
- How to Merge Two Google Workspace Accounts
- About Us
In some cases, managing multiple Google Workspace accounts just isn’t practical. There comes a time when bringing everything under one roof makes the most sense. Unfortunately, the tech giant doesn’t offer a one-click “merge Google Workspace accounts” option (unless, of course, you have at least 5,000 users in each Console), so you’ll need to roll up your sleeves and tackle the process step by step.
This guide breaks it down for you, clear and simple. By the end, you’ll have all your data and users neatly consolidated under one Admin Console without disrupting your team’s workflow.
Why Merge Google Workspace Accounts?
There are plenty of reasons to merge accounts, but most boil down to better efficiency and cost savings. For example:
- When two organizations come together—as in mergers and acquisitions—it’s easier to manage one account instead of two separate systems.
- Juggling multiple Admin Consoles can get chaotic fast. Combining accounts makes life easier for admins and users alike.
- Maybe your company operates under several domain names, but managing them through separate accounts is cumbersome.
Whatever the reason, the goal is the same: move everything from one Workspace (let’s call it OrganizationB) into another (OrganizationA) while keeping things running smoothly.
How to Merge Two Google Workspace Accounts
Step 1: Get OrganizationA Ready
OrganizationA will act as your primary account—the one where everything from OrganizationB will end up. To prepare it, set up accounts in OrganizationA for every user in OrganizationB. These accounts will be the destination for all migrated data (e.g., [email protected] → [email protected]).
Step 2: Before You Migrate
The challenge of migration isn’t the transfer itself but the preparation and follow-up steps.
- Assess the risks of the migration—determine how necessary it is and what level of data loss is acceptable. Keep in mind that there are quotas and restrictions on transferring certain data between services.
- Create a detailed checklist for every stage of the migration (before, during, and after). Pay special attention to the domain transfer process, as all accounts will need to be temporarily disconnected from the domain. This means any emails sent to the migrating accounts during this period may be lost.
- Check with your hosting provider to see if email forwarding is possible while the domain is being disconnected and reconnected. Set up a forwarding rule on the hosting provider’s side.
- Ensure third-party services won’t lose access during the migration.
- Identify all links to public documents, determine how many there are, and plan how to update or replace them.
- Schedule the migration date and communicate the plan to all employees, including potential issues or important considerations.
- Prepare checklists for both the main migration and any delta (incremental) migrations.
Step 3: Transfer Data from OrganizationB to OrganizationA
Once the accounts are ready, it’s time to move over the data. Here’s how:
Emails
Use Google Workspace’s Data Migration Service (DMS) to transfer emails from OrganizationB to OrganizationA and subsequently merge Google Workspace accounts. In OrganizationA’s Admin Console:
- Go to Data Migration and configure OrganizationB as the source.
- Map each user in OrganizationB to their corresponding account in OrganizationA.
- Start the migration and let it run.
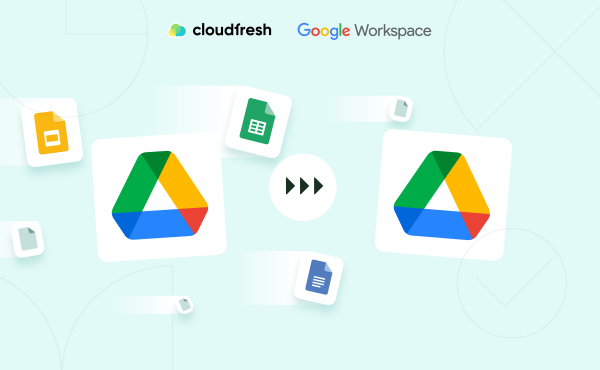
Drive Files
For Google Drive, you’ll need to move the files from OrganizationB to OrganizationA. While our guide on how to move Drive files to another account covers several manual methods, admins in a merge scenario can also use:
- Google Takeout breaks the structure and access permissions but lets you download everything for free.
- DMS can only migrate emails, as long as they were stored using the IMAP protocol. If you need original emails, migration can be done via API, but it has a limit on the number of transferable objects.
- CloudM is a paid service, but it automates the migration process (in case you haven’t developed relevant expertise just yet, consider reaching out to a verified Google Workspace partner).
Billing Records
Before shutting down OrganizationB, download any billing or invoice records you might need for future accounting or tax purposes. We recommend keeping the account active even after the migration is complete and you’ve verified everything transferred correctly. Instead of deleting it, downgrade paid licenses to Cloud Identity Free, and keep 1–2 paid licenses until you’re sure the migration is fully complete.
Step 4: Close OrganizationB’s Workspace Account
Once all the data has been moved to OrganizationA and confirmed, it’s time to close down the account in OrganizationB. To do that, terminate any active subscriptions, like a Google Workspace license, Marketplace apps, or additional storage plan. Once you’re 100% sure everything is transferred, delete the OrganizationB Workspace account.
Step 5: Add OrganizationB to OrganizationA
Now that OrganizationB is no longer a separate account, you can add it in OrganizationA’s Admin Console. This step allows users to keep their original @OrganizationB.com email addresses while being managed under OrganizationA.
Here’s how:
- Go to Domains in the Admin Console for OrganizationA and click on Manage Domains.
- Select Add a Domain and input OrganizationB’s details.
- Verify ownership of OrganizationB. Google provides several verification methods, such as adding a TXT record to OrganizationB’s DNS settings.
- Once verified, OrganizationB will be part of OrganizationA’s Workspace environment as an alias or secondary domain.
Step 6: Update Email Addresses
To make things easy for your users, update their email addresses in OrganizationA to match their original OrganizationB addresses (e.g., [email protected] → [email protected]).
That way, they can continue sending and receiving emails from their familiar @OrganizationB.com address without interruption. Plus, they get to enjoy the benefits of being managed under a single Admin Console.
Congrats! You’ve now managed to successfully combine Google Workspace accounts.
What to Keep in Mind
While the steps are fairly straightforward, there are a few things to watch out for:
- Run the final delta migration during non-working hours. It might take some time to merge Google Workspace accounts, and you don’t want your team locked out mid-workday.
- Before rolling this out to everyone, test the process step-by-step with a small group of users. It’s the best way to catch and resolve any issues early.
- Some shared files might lose permissions during the migration. Have users double-check their Drive files and re-share them if needed.
- Make sure OrganizationA accounts have enough storage for the incoming data. Upgrade storage plans if necessary.
Why It’s Worth the Effort
Once the migration is complete, everything will be under one Admin Console, and your team can focus on what they do best without dealing with multiple systems. Here’s what you’ll gain:
- Managing users, permissions, and billing is much easier when everything is in one place.
- Users can keep their original email addresses while your team benefits from centralized operations.
- You’ll eliminate duplicate subscriptions and get resource usage under control.
- Shared drives, calendars, and other tools will work natively.
About Us
It might seem daunting to merge Google Workspace accounts, but it’s entirely manageable with a clear plan and some patience. Having consolidated everything into one account, you’ll have a. simplified operations, b. reduced costs, and c. improved collaboration across your teams.
Follow these steps, take your time, and don’t be afraid to turn to Google Workspace consulting if you need help. In the end, you’ll have a clean, efficient setup that makes everyone’s job easier, supported by Cloudfresh, a Global Google Cloud Premier Partner specializing in Work Transformation.
![]()

Get in touch with Сloudfresh